UPDATE: I created a more in-depth class on this subject because so many people had questions about this effect. Take the course here: http://skl.sh/2jGvWNy
I’ve seen this effect used in some wedding photographer’s images with the heart shaped bokeh (blur) is in the background so I did a little investigating into how this effect is accomplished.
You can watch a video tutorial on how I did this above, or buy a premade kit by clicking HERE.
This little knife is key because the designs have to be very small and (can be) intricate:
Here are the steps to take pictures like this:
- Watch the video tutorial I made
- Find a light source(s) that are bright and contrasty to what’s around it: christmas lights, candles, street lights, etc.
- Put that thing you made on your fast lens and set it to the widest aperture you have (and aperture priority), my Canon 28mm goes to f/1.8
- If you don’t have a really fast lens, try and get as far away from the light source(s) as possible
- Experiment with distance to the camera and the focus distance you use on your lens to focus (the light source must be way out of focus)
- Don’t get discouraged! My first photo, as you can see in my video, sucked, keep experimenting with it to get best results, if you’re still having trouble contact me
The limitation of taking pictures of things with this on your camera is that since your camera is set to it’s closest focus distance, your subjet will have to be very close to the camera, unless the light source is very far away (experiment!).
You can also take images of just these blurry background lights and composite them into other images using Photoshop:
- Open the two images you want to combine, in this case, one will have just the custom bokeh shapes and the other is your main subject.
- Put the bokeh layer on top.
- Change it’s blending mode from ‘Normal’ to ‘Screen’ (this is assuming you’re using a bokeh image with a black background like the ones I provide below – click them to enlarge, then right-click, choose “Save Image As…”)
- Now all you should see are the custom bokeh shapes
- Add a layer mask to the bokeh layer and use a black brush to paint away where the bokeh is covering your foreground subject (the other image you opened that is the layer below this one)
DOWNLOAD and try the above directions:



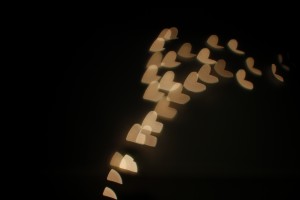
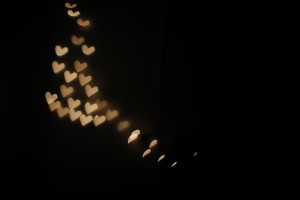
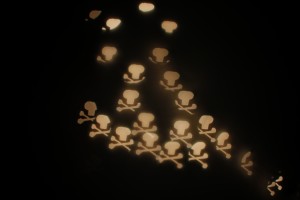
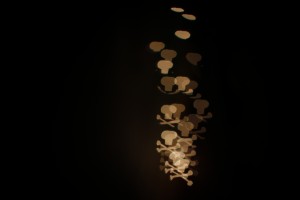
very cool!!! small suggestion you can buy a “punch” in the a craft store that have these designs that are pretty cool they are commonly used for scrapbooking but would work well for this
Hey Donna, thanks for the suggestion. You’re right those stamps would be perfect. I actually almost bought them but they were $5 a piece! So instead I spent $6 on the craft knife and have infinite possibilities of shapes instead of one. Also, like a stapler, you can only slide them so far into the paper and wasn’t sure if it would be enough room to get to punch a shape in the center of the paper. Happy shooting!
I dont really understand the purpose))
Hey Lion Arts – check out the flickr group to see some samples of how people use this effect: http://www.flickr.com/groups/shaped_bokeh/pool/
Fantastic video … thanks for that. Going to come in REALLY helpful.
Very grateful, thanks again.
Aoife.
Awesome, Lucas! Thanks for showing what didn’t work, too — that really helps. That craft knife looks awesome. Looking forward to giving this a try.
You’re welcome Sharon, post back here if you end up making some photos with this technique, would love to see them. Good luck.
Thanks for the tutorial Lucas! What a great tutorial, best one i’ve seen so far. Will put it into practice soon… just have to find out where I can buy the craft knife/scissors similar to the one you’re using in Australia.
You’re welcome Ina! Hope it works out well for you. So you can’t get it through Amazon.com with the link I put in my blog post above? Good luck!
Of course the alternative to creating a hood out of card would be to use the UV filter that you mention as the holder…
Thanks for the tutorial! I had couple of issues:
1. I had vignetting around the edge
2. As the custom bokeh block most of the incoming light, I got pretty dark potrait photo
When I made the shape bigger, the vignetted disappeared but so did the bokeh shape.
I was using 35mm f1.8 and cut ~1.1cm wide shape.
Can you please let me know how to fix it?
Thank you.
@Al – 1. All these images will have some vignetting. To minimize it, get the cut out as close to the lens as possible. Also, try and compose your images to make it easier to crop the vignetting in post.
2. Bump up your ISO if the image is too dark and use an off camera flash to light up any foreground subjects. Yes, if you make the cutout too big (bigger than the actual aperture opening) then the custom shape will disappear from your final image.
Also, consider the type of lighting that your using. Make sure it’s point light sources and play with the distance between your camera and the light source will give you different size bokeh shapes.
Keep experimenting with it, that 35mm 1.8 should get you good results eventually.
Good Luck!
Thank you very much!! I’m going to try it again tonight! Have a wonderful day 🙂
Thank you so much…I’ve been wanting to learn how to do this! My question is, how do you take a photo that is not simply bokeh shapes; that also includes a subject?
Hey Wendy – glad it’s helpful. It definitely takes some experimentation to get a subject in focus and get the bokeh shapes behind it. Here’s some things to consider:
– to get the bokeh shape the biggest you need to have your focus on manual and pulled in as close as possible
– that means your subject needs to be close to the camera as well, or vary the distance of the light source to be able to put the subject a little further away from the camera
– when I did it, I also have to use a flash on the subject to get it exposed properly
Good luck and thanks for watching!
-Lucas
Lucas,
I found your tutorial video for this on youtube and came here to your blog to ask you a quick question. First of all your video really helped alot!! My question is can I do this with a Canon Power Shot, this is not my regular camera my other one is having some repairs done to it so this is the only camera I have for the time being. I’ve tried it but it’s not working for me and I didn’t know if maybe it was because of the lens on the camera or something else I’ve done. Thank you for any help.
Allison
Hey Thank you so much for this technique. but i have some confusion here. i made that thing put it in front of my lens but i didnt get lots of bokeh shapes as i saw in your pic. Can you please tell me how to get these bokeh shapes. it appeared one one 🙁
Hi, I’m brazilian and it was really hard to find a nice tutorial like yours. Your tutorial is amazing, congrats.
Dear Lucas
Fantastic Work.Thanks for the tutorial.
Brgds
Mlton
does the bokeh adapter only works for large aperture lense? would it also work for the basic lenses? (e.g. 18-55 f3.5-5.6)
Yes, you’d need something more like a 1.8 which you’re only going to find on prime lenses. Hope that helps.
Hi and thank you for your tutorial, none of the others seemed to help as much as yours :o)
I tried it on my Samsung NX10 with both 18-55mm and 50-200mm lenses and it works a treat, I now have a flat battery, when It’s fully charged they’ll be nothing stopping me :o)
Tomorrow my Canon D600 arrives, I’ll be trying it with that too
Thanks again for an easy to understand process
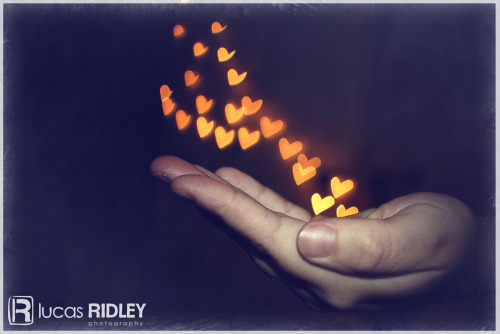
Great Tutorial lukas.. Thanks from India. In the picture where you have the hearts in your hand did you superimpose pictures on photoshop?? Or did something else??
Thanks Murthy! That hand photo was not photoshopped, the hand was just in front of the lights that were on in the background of the image – I put the hand as close to the camera as I could so the lights were as blurred as possible. Good luck!
Hello,
I’ve watched your detailed video on youtube on how to do shaped bokeh, and I wanted to thank you very much indeed. However I’ve done all the stuff but there’s no result yet 🙁 You said don’t get discouraged but I’m getting mad because I don’t know what’s wrong with it! If I can manage, I’ll be very happy!
Neverthless you have great videos, this coincidence is a real chance for me!
Thanks thanx, thanx again!
Thanks, sorry to hear it’s not working. Double check that you are using a camera lens on your DSLR that can go down to f/1.8 for it’s aperture and that is what it is set to, also make sure you’re taking a photo of a point light source like christmas tree lights.
Hi sir.very good video, my question is: do I must put my lens on auto focus? Because the paper could block the lens, or manual?
Always manual, you have to pull the focus as close of a distance as it can get for this to work. good luck
Here’s a video tutorial on how to lasercut your bokeh filters. (And you don’t even need to own a laser cutter!)
Enjoy!
http://www.youtube.com/watch?v=F35qMEcxU8U